Issue
Deploy the The support _ tool application can be deployed to Zend Server for IBM i using Deployment rather than Application Deployment. This method can be used as an alternative to the menu option (Option 40. from the ZSMAINT menu), and for Zend Server versions 8.5.x now includes the Apache logs Support sometimes needs to diagnose the current problem.
Environment
Zend Server 7 This version of the support tool application for Zend Server for IBM i requires a minimum version of 7.0 or later, running on any supported version of the IBM i Operating System.
Support Tool Versions for Zend Server for IBM i
There are 2 versions of the Support Tool application for Zend Server IBM i.
Details
, depending on your current version of Zend Server.
Please note that the names of the links to the downloads are similar, so be sure to download the the .zpk file that is applicable to your version.
Version 2019.0.x and higher
Please access the following link.
https://github.com/zendtech/zs-support-tool/releases
Locate the Download ZSST_IBMi_20182019.0.191107.203724.zpk file and click to download it to a location on your PC.
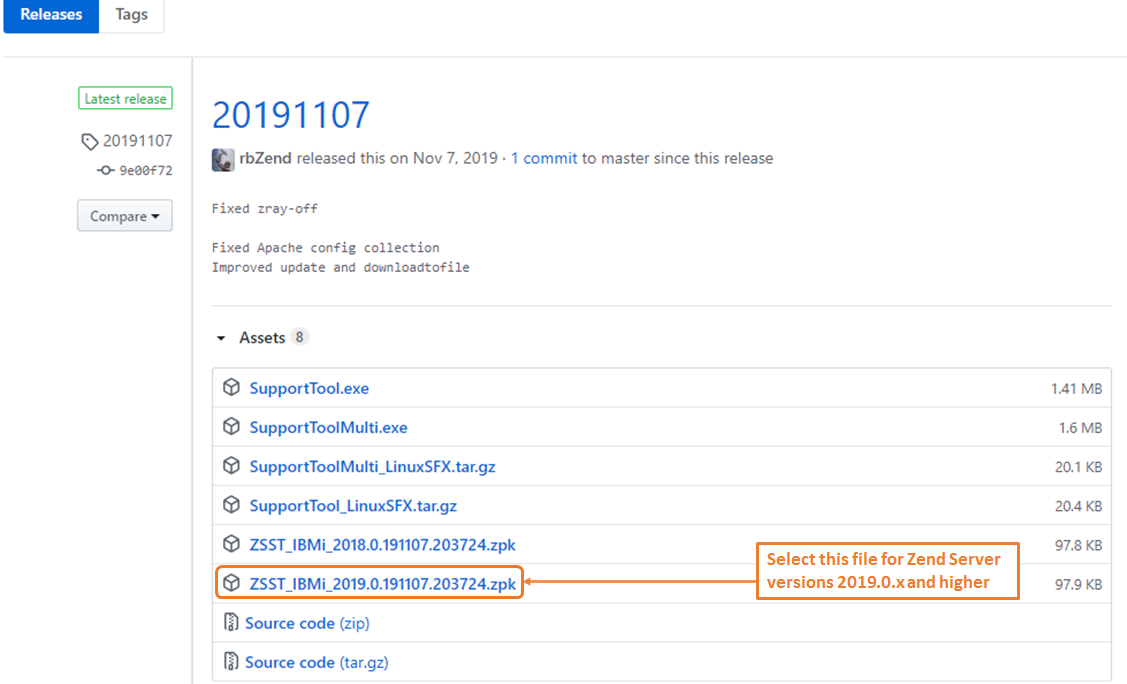 Image Added
Deployment Instructions
Open the Zend Server User Interface (UI) and navigate click to open the Applications tab. Click Manage Apps.
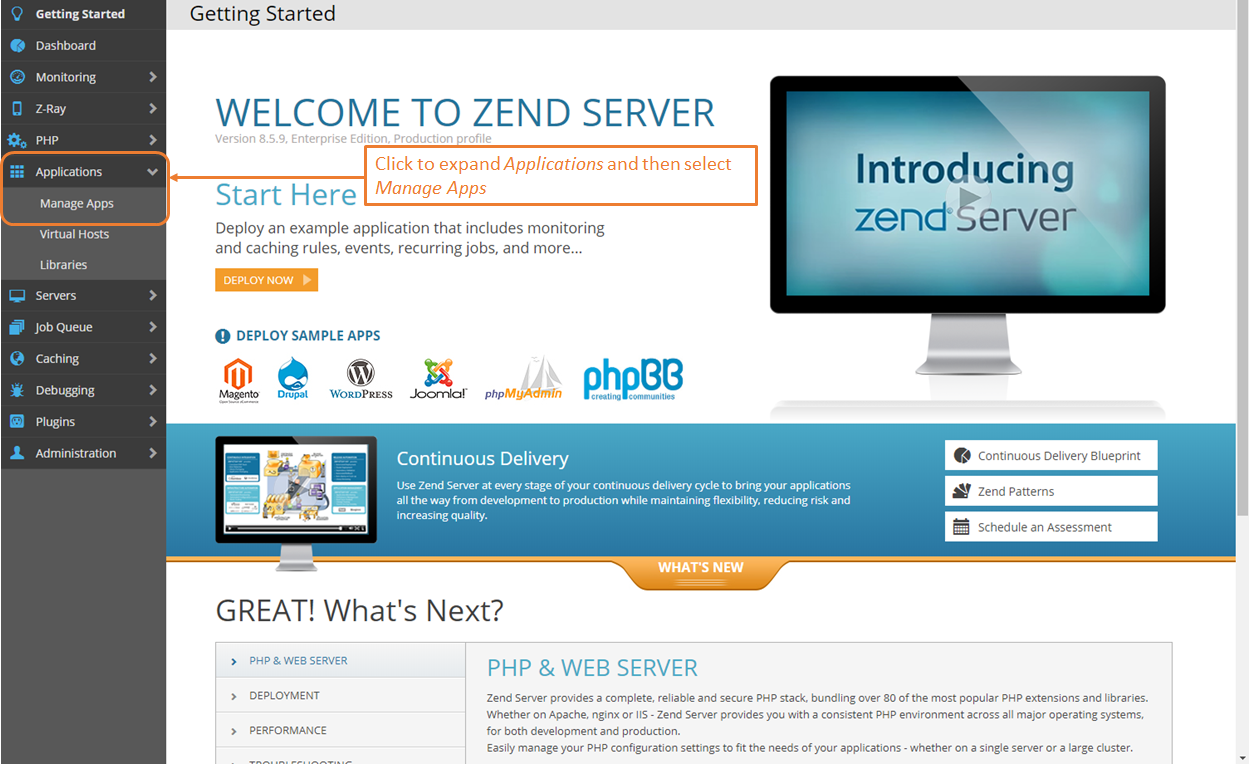 Image Added
There are no default Applications deployed when Zend Server is installed, so your installation may already have Applications installed and may not look exactly like the example below.
Click the Deploy Application button deploy the new Support Tool Application. | Manage Apps. Click the "Deploy Application" tab on the top left of the window.
 Image Removed
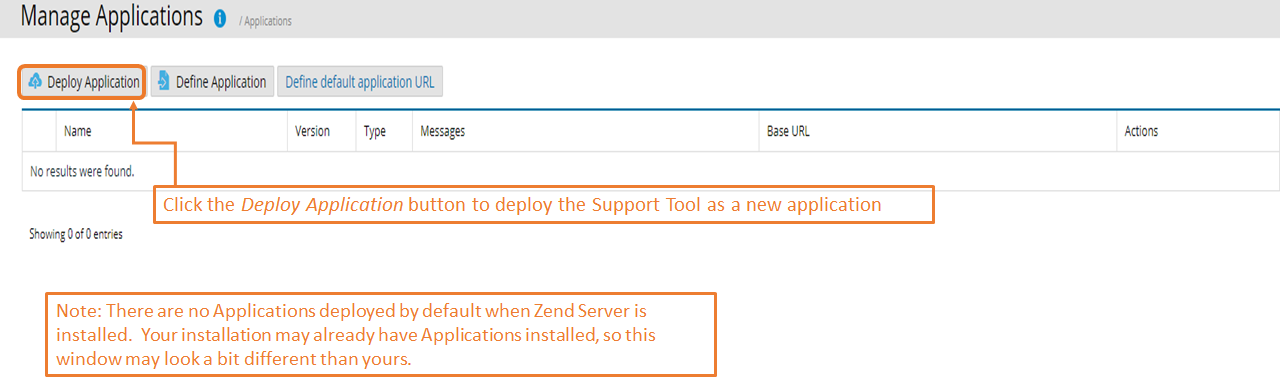 Image Added
The 'Deploy Application" dialog box will be presented. Click the "Choose File" button and navigate to location of the downloaded .zpk file on your PC. Click to select the downloaded .zpk file.
Once the file has been uploaded, you will see a message indicating "Success! Package ... has successfully uploaded". Press Next to continue.
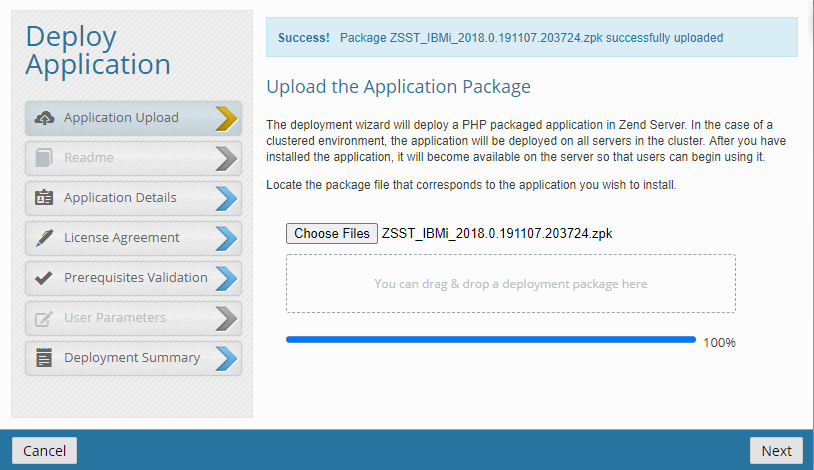 Image Removed
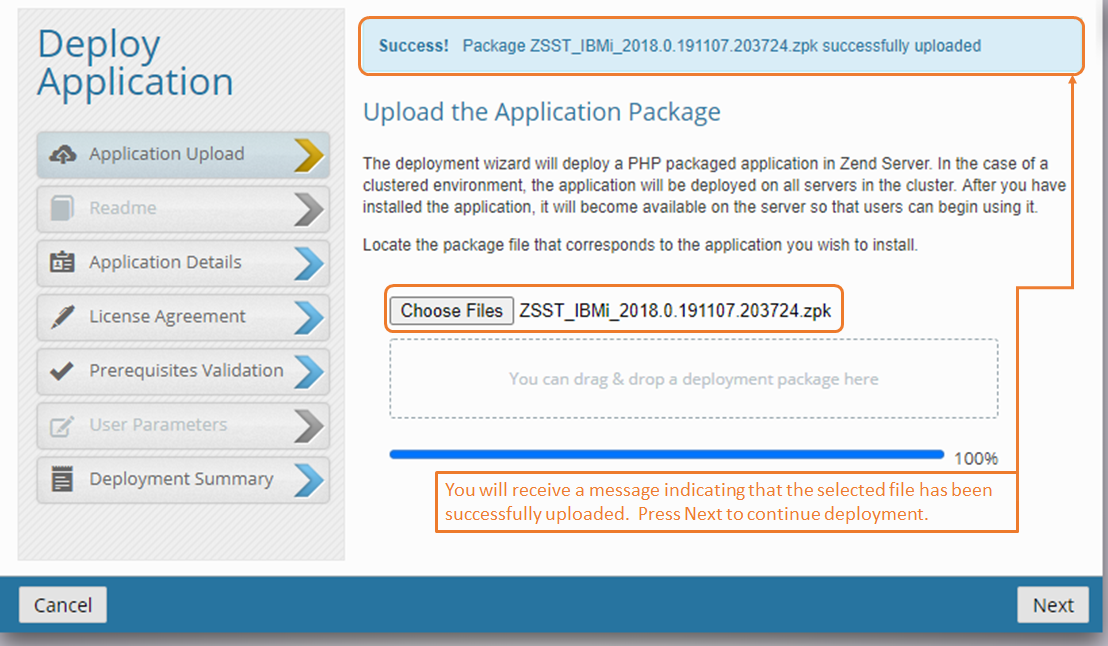 Image Added
The "Enter the Application Details" dialog will be presented. Accept the defaults for "Virtual Host" and position to the "Path" field.
In the "Path" field, enter /support_tool and press Next.
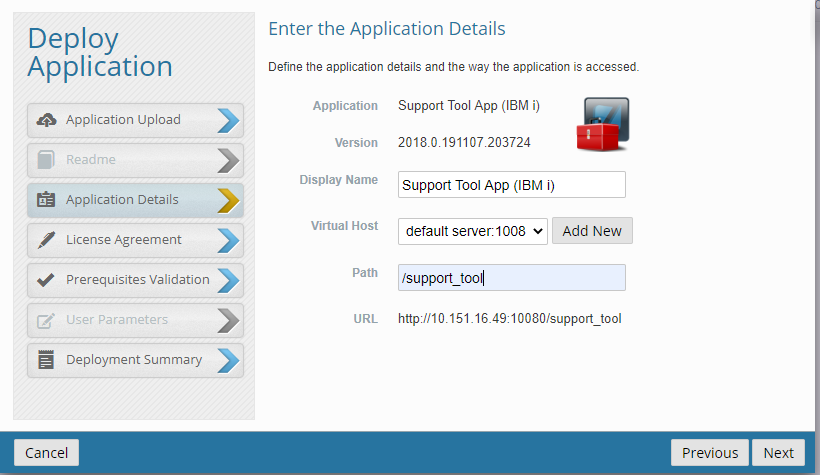 Image Removed
Accept the End User License Agreement and press Next.
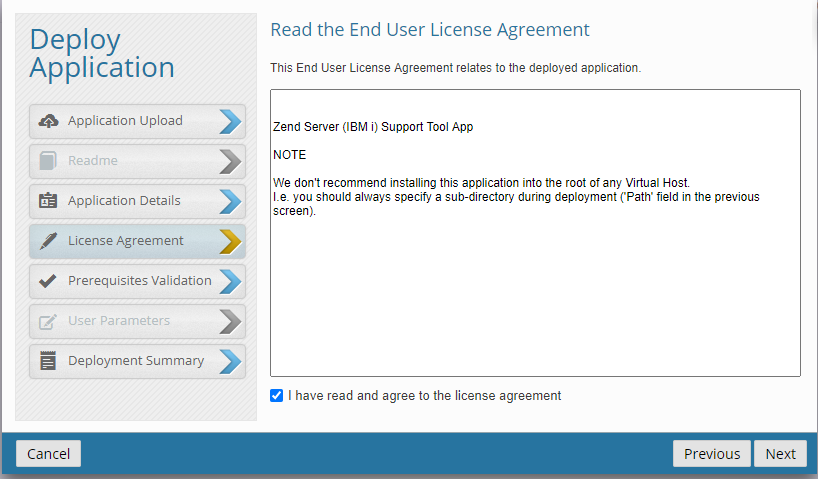 Image Removed
The "Validate the Application Prerequisites" dialog box will be presented and will verify that Zend Server is at the minimum required version of 7.0.0, and will display the current version. Press Next to continue.
The "View the Deployment Summary" dialog box will be presented to verify the deployment details. Press "Deploy" to continue.
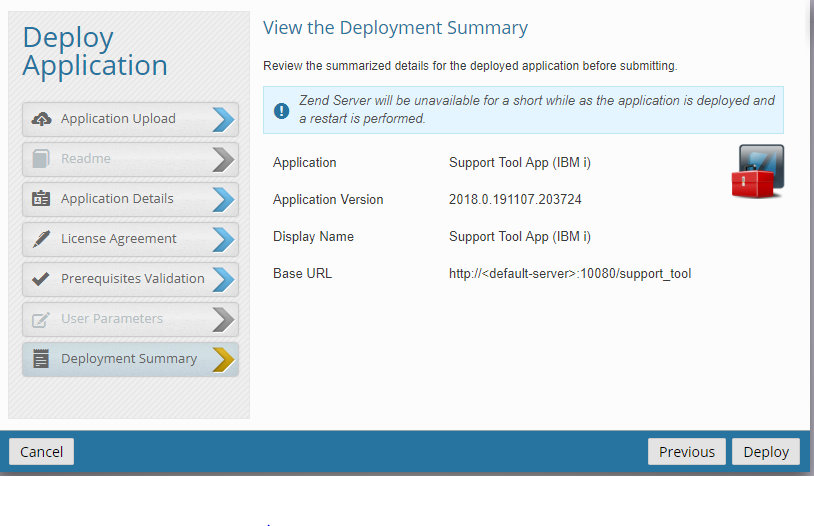 Image Removed
The system will process for a few minutes while the application is being deployed and will flash a brief message that the Deployment was successful and will return to the "Manage Applications" window.
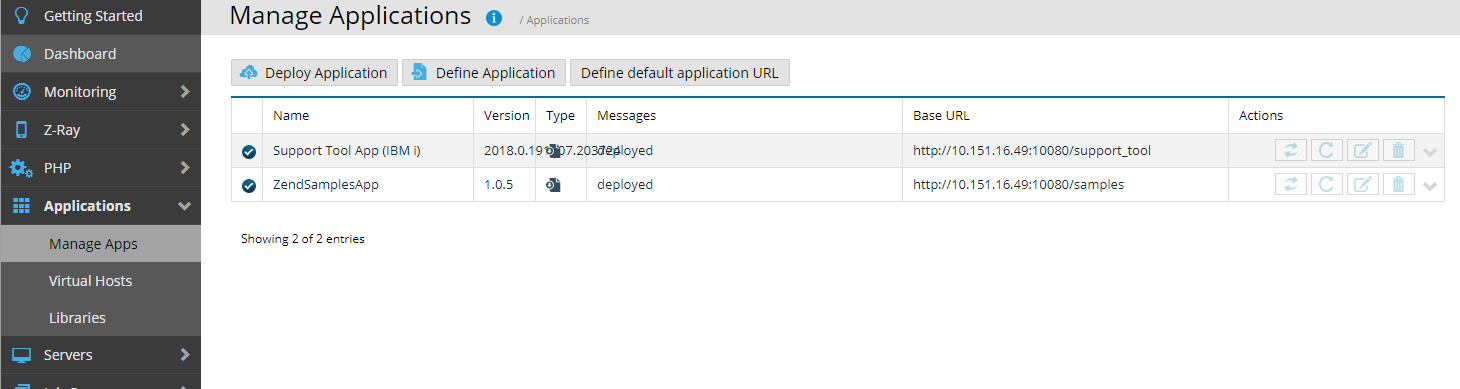 Image Removed
To run the Support Tool, access the link from your browser. http://<your_ibmi_ip>:10080/support_tool
Click the button to Run the Support Tool.
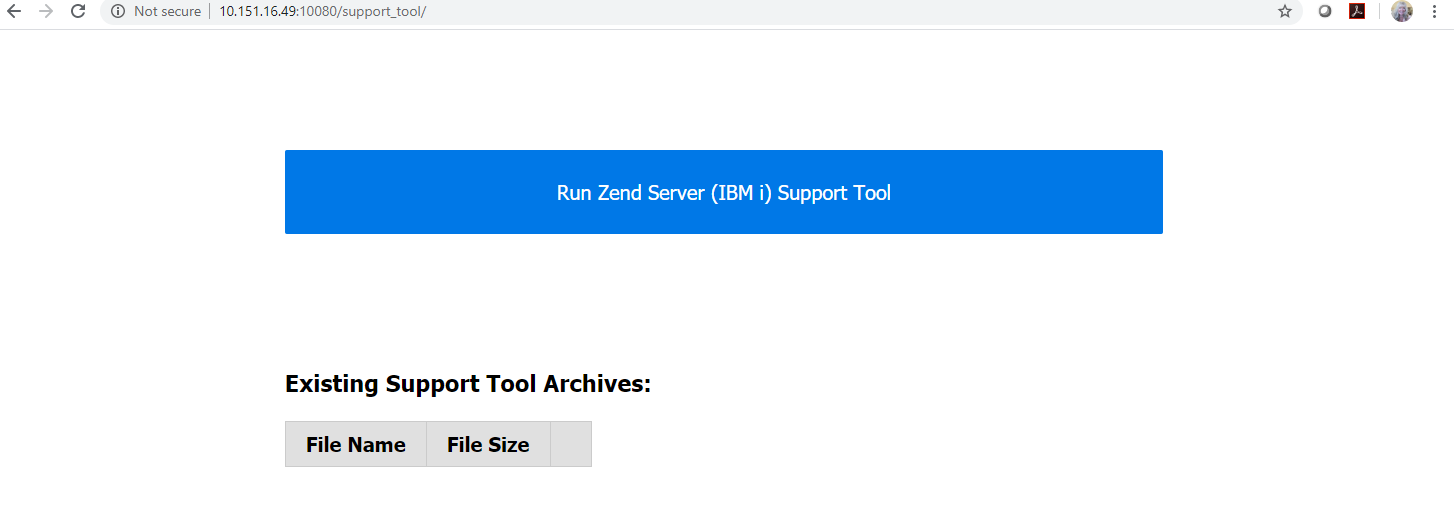 Image Removed
The system will perform various plugins, ending and starting them, as it gathers the required information to create the Support Tool archive.
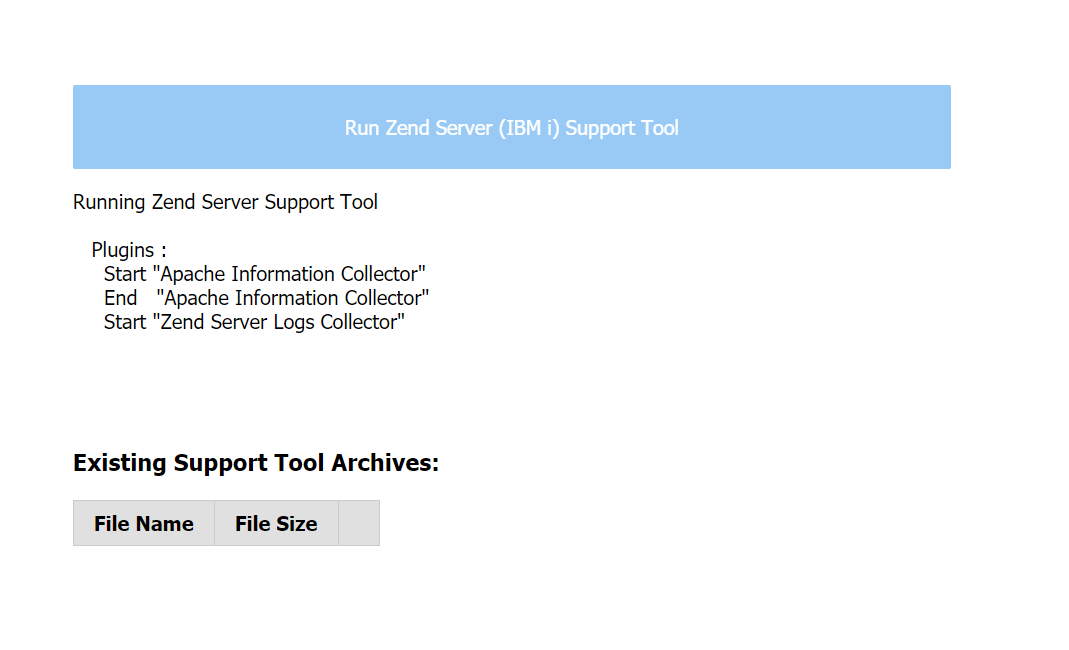 Image Removed
Once the process has completed, a message will be sent that the Support Tool execution has completed and the new archive will be available in the list. Click the File Name to download the .tar.gz archive to your PC.
Path to deploy the Support Tool with. In the example below we are using /support_tool. This will determine the URL created for the deployed application, as shown below. Press Next to continue.
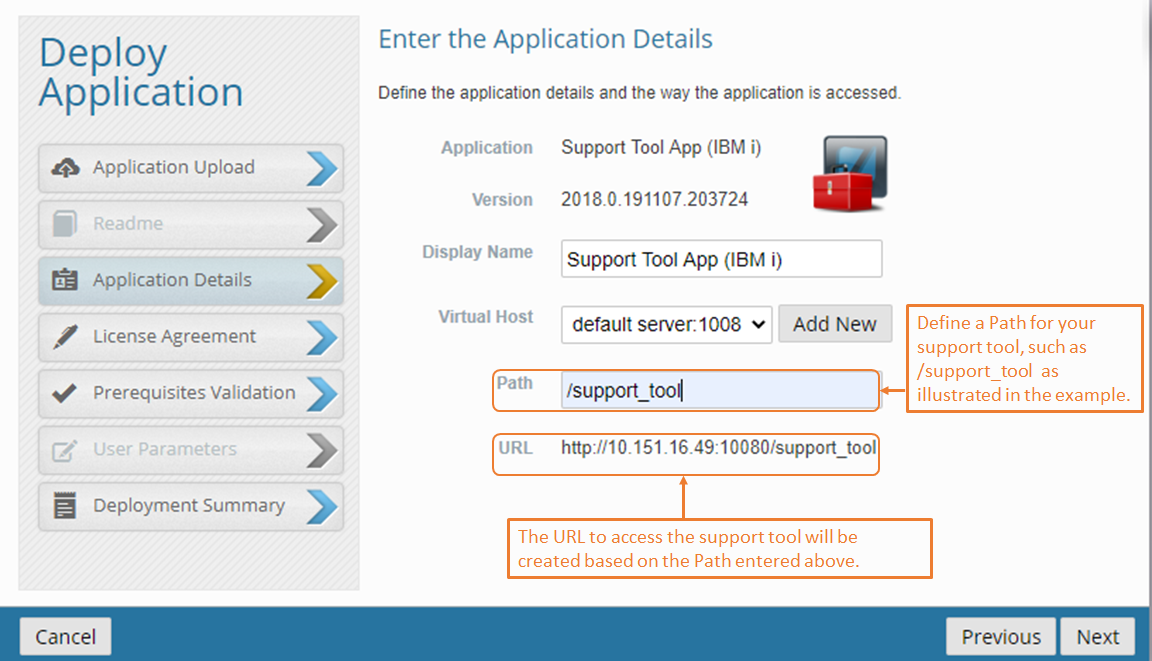 Image Added
Once the Support Tool Application details have been determined, the License Agreement accepted and the Prerequisites validated, the View the Deployment Summary window will be presented for verification. If the details are correct, Press the Deploy button to continue the Deployment.
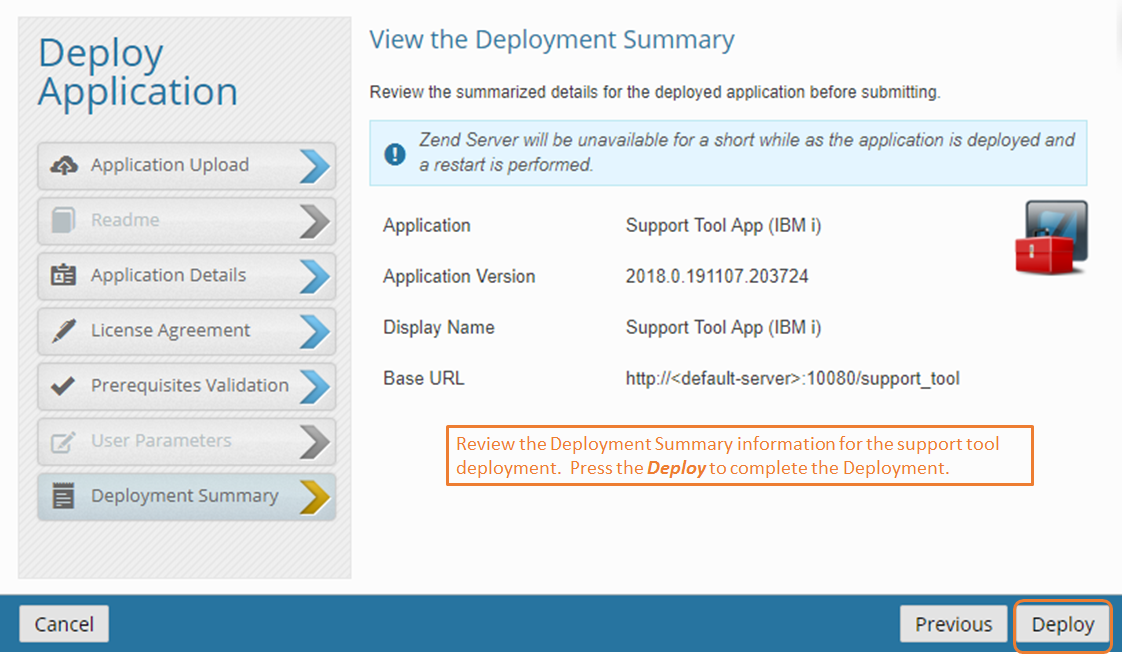 Image Added
When the Deployment has completed, the Manage Apps window will be updated with the newly deployed application. Click once to display the details, as illustrated below.
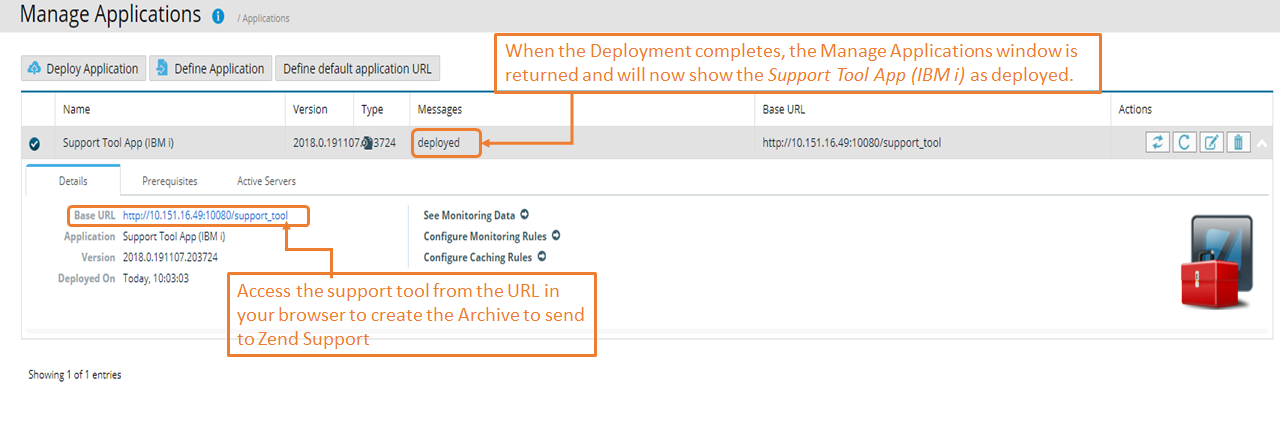 Image Added
To run the Support Tool, access the Base URL from a browser. Click the Run Zend Server (IBM i) Support Tool to generate the .tar.gz archive.
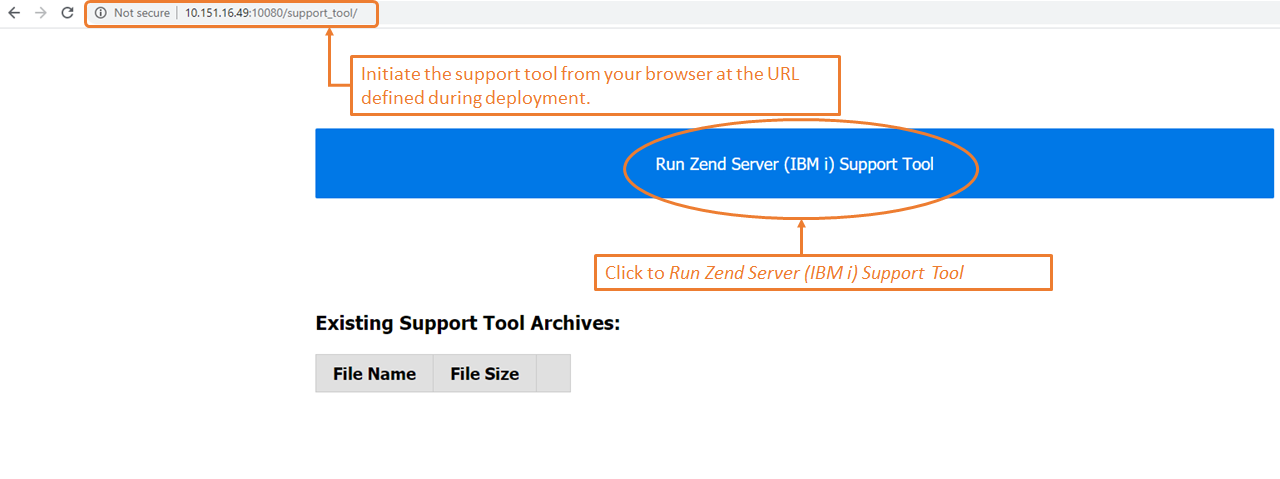 Image Added
The application will process for several minutes and when it completes, a message will indicate that the Archive was successfully created. The new archive will be listed in the "Existing Support Tool Archives:" list.
Click to download the .tar.gz file to your PC. You will be able to now attach the file to the Zend Support ticket.
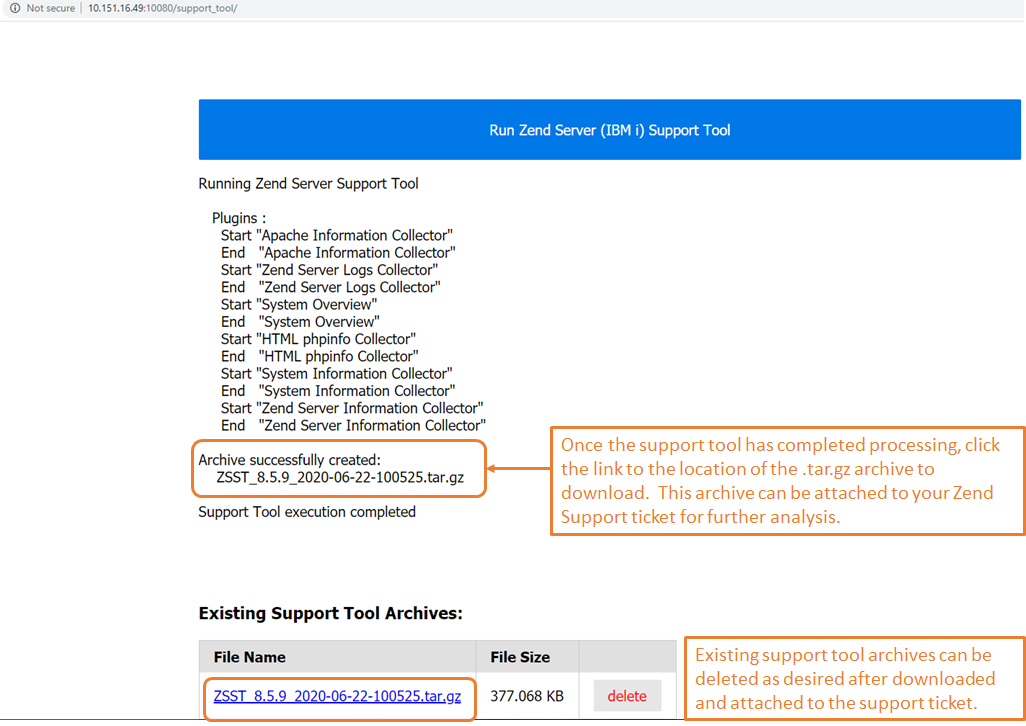 Image Added
Versions Zend Server for IBM i 7.0, 8.5.x, 9.1.x and 2018.0.x.
Click on the link below to access and download the .zpk file for the support tool application. Click to download ZSST_IBMi_2018.0.191107.203724.zpk to a location on your PC.
https://github.com/zendtech/zs-support-tool/releases
 Image Added
Deployment Instructions
Open the Zend Server User Interface (UI) and click to open the Applications tab. Click Manage Apps.
Image Added
There are no default Applications deployed when Zend Server is installed, so your installation may already have Applications installed and may not look exactly like the example below.
Click the Deploy Application button deploy the new Support Tool Application. Click the "Deploy Application" tab on the top left of the window.
Image Added
The 'Deploy Application" dialog box will be presented. Click the "Choose File" button and navigate to location of the downloaded .zpk file on your PC.
Once the file has been uploaded, you will see a message indicating "Success! Package ... has successfully uploaded". Press Next to continue.
Image Added
Enter the Path to deploy the Support Tool with. In the example below we are using /support_tool. This will determine the URL created for the deployed application, as shown below. Press Next to continue.
Image Added
Once the Support Tool Application details have been determined, the License Agreement accepted and the Prerequisites validated, the View the Deployment Summary window will be presented for verification. If the details are correct, Press the Deploy button to continue the Deployment.
Image Added
When the Deployment has completed, the Manage Apps window will be updated with the newly deployed application. Click once to display the details, as illustrated below.
Image Added
To run the Support Tool, access the Base URL from a browser. Click the Run Zend Server (IBM i) Support Tool to generate the .tar.gz archive.
Image Added
The application will process for several minutes and when it completes, a message will indicate that the Archive was successfully created. The new archive will be listed in the "Existing Support Tool Archives:" list.
Click to download the .tar.gz file to your PC. You will be able to now attach the file to the Zend Support ticket.
Image Added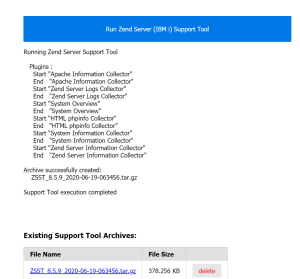 Image Removed